skip to main |
skip to sidebar
Värst vad tiden går fort när man har roligt! Och roligt har jag verkligen när jag leker med Reprints nya julstämplar och lite olika embossingpulver. Här har jag först stämplat hela motivet med en genomskinlig embossingdyna som är tillräckligt klistrig för att man ska hinna jobba med olika pulver på samma stämpel. Motivet är sedan monterat med 3D-kuddar på ett julrött papper med stjärnor på.
Time flies when you're having fun, and fun is exactly what I have when I'm playing with the new Christmas stamps from Reprint and some embossing powder. To get this effect, I first stamped using a clear embossing stamp pad that is sticky enough to have time to work with different embossing powders. I then mounted the stamped image using foam squared on top of a Chistmas red paper with little stars.
Jag började med att försiktigt hälla pulver Black Magic runt kanterna, och på sigillstämpeln. När väl det var gjort så var det enkelt att färga in texten med rött och granarna med metallic-skimrande grönt pulver. Om du vill ha en utförligare beskrivning av tekniken så titta gärna på detta inlägg.
I started with the border in Black Magic powder. After that it was really easy to add the red for the text and shimmering green for the trees. If you want to know more about how to use more than one embossing powder on the same stamp, then take a look at this post.
Love,
Ulrika
Har du provat att använda fler embossingpulver på samma motiv? Om inte - GÖR DET! Det är hur kul som helst, och spännande att se vad effekten blir beroende på vilka färger man väljer. Här har jag använt några av Reprint's collagestämplar, som gör sig väldigt bra med den här tekniken. Ett tips är att använda svart eller väldigt mörkt pulver till ansikten, annars kan det se lite konstigt ut.
Have you ever tried to use several different embossing powders on the same stamped image? If not - DO IT! It is seriously fun, and so exciting to see how the result turns out differently depending on the choice of embossing powder colours. For these cards, I used some of Reprint's collage stamps, which are perfect for this technique. A tip is to use black powder - or at least very dark - for any faces, otherwise they may turn out a little spooky.

Börja med att stämpla motivet med en Versa mark dyna, den är ofärgad och klibbig tillräckligt länge för att man ska hinna experimentera lite. Häll sedan lite pulver precis på det motiv du vill ska ha den färgen, och häll av pulvret på ett papper så att du kan återvinna det som blir över. Sen fortsätter du med nästa färg. Den nya färgen kommer bara att fastna där det fortfarande finns klistrig stämpelfärg, inte på de partier där du redan hällt på pulver. När hela motivet har embossingpulver och allt överflödigt pulver är avhällt så värmer du med en värmepistol till allt pulver smält.
Start by stamping using a Versa mark pad, which is clear and sticky long enough for you to play around with different embossing powders. Pour a little powder over part of the image, and then pour shake it off over a piece of paper so you can collect and re-use the excess. Move on to the next color of powder. The new colour will only adhere to the sticky areas, so the area you just covered will stay the same. Continue until all of the image is covered with embossing powders, and make sure you have removed the excess powder. Heat and melt the powder using a heat tool.
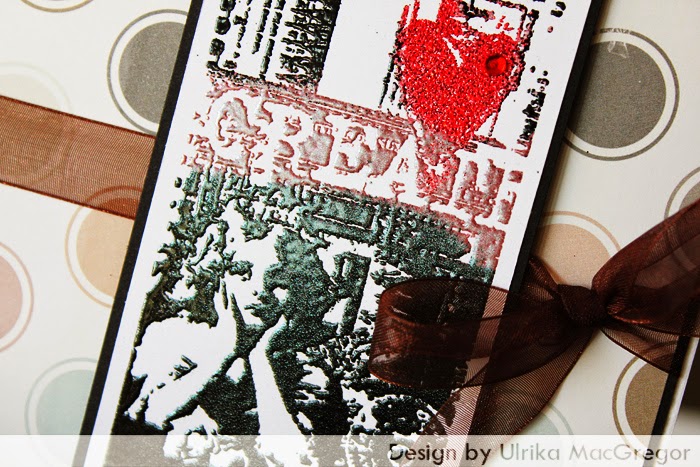
Med lite precision så kan man välja precis vilken del av stämpeln som ska ha vilken färg, här har hjärtat blivit rött, texten rosa, och övriga delar svarta.
By being careful, you can really work with precision and colour each area as you like. Here, the heart is red, the text is pink and the rest is black.
Love,
Ulrika